GRADE PREP FOR PAVING

blading curb

This means using the curbs to control the grading and paving operations. This may intimidate some operators, but it should not. The curb is your friend if it is properly poured.
 Many times the concrete crews don’t pour good curb. Examples are vertically uneven curb or the pan may have low spots. This becomes really noticeable on grades less the 2%.
Another pet peeve of mine is a concrete crew that does not send a laborer to clean up ‘slobbers’ while the curb is still green. This is a good way to break curb with a machine or at a minimum; have it affect grade production and accuracy.

 One of the first things I do to prevent curb damage is ‘back the curb up’; this entails gently placing dirt in the excavated area directly behind the curb. It should be compacted if there will be something structural like a sidewalk or pavers behind the curb. In any case it is not a good idea to do too much compaction wise until there is at least some gravel on the street side.

 I have been on many jobs that wanted me to start cutting grade as soon as the concrete crew removed the forms from very ‘green’ curb. I don’t advise this,let it cure a day or two. If the grader hits one rock and slides the blade sideways or shoves a rock into the curb, it will break it!

 Rule # 1 is: figure out what the structural section is for that job… i.e. 3″ on 6″ meaning you place 6 inches of a.b.c followed by 3 inches of asphalt. This will be measured down from the lip of the pan or in the case of a Type 222 18”single curb you factor in the amount of ‘reveal’ which is normally 6” on this particular curb.
The wear course material such as chip seal or a.c.f.c will be above the lip of the curb, this allows water to drain into the pan.
 Another one of my rules is: don’t get close to the curb until you get the bulk of the material removed. I like to get the grade as close as I can before putting centerline hubs in, the less you go over them the better! You have to proceed with a slower game plan when the street is narrow. These streets are more difficult in a way because of the limited space between the centerline hub and the curb.
The hardest part is for a scraper or loader to pick up material in tight quarters. I actually like working between curbs, especially ‘freehand’. It gives you a guide the whole length rather than just at stations. Your grade should be as consistent as the curb.
Using a sonar attachment and a 2D cross slope box makes it really go nicely. If the curbs on both sides correspond. The elevation should be the same for a crown and whatever the difference should be in a super elevation situation.

When getting down to the fine grading, I like to pitch my moldboard forward enough so that the top part of the board is away from the curb that it does not touch when the actual cutting edge is right in line vertically with the lip. This also provides a better angle to cut material.
 I generally thoroughly rip any material I want to cut or grade; in this scenario you really have to be careful of buried utilities. I generally ease up if I see a gas or water meter box; they are fed by the services which generally cross the street. They are supposed to be deep enough, but sometimes they are not.

I am used to having the manholes left at or slightly below subgrade with a steel plate covering them. They are brought up to grade later in new construction. However, when reworking an old street sometimes you have to work around or over live sewer manholes. If you knock the lid off and fill the manhole with dirt, you have very nasty situation (especially with a really deep manhole). Fortunately I have never put enough material in a manhole to plug it, but I have seen it done… you may have to clean it yourself or help your laborer if you like them at all.

When I am spreading select material in a street I will process it by windrowing it up on one or both sides; the trick to help yourself and your laborer is to not stack it too close to the curb. When you get it all balanced out and closer to grade you can ‘wing out’ your moldboard to allow material to flow to the curb in the correct amounts. You probably will get some on the pan. Ideally the laborer can go along sliding their shovel on the curb cleaning it off.

Curbs make it easier on the paving crew too, especially if they are not running automatic grade controls.

PRODUCTION LOADING

966 m

PRODUCTION LOADING

Production loading is making every move count and thereby making good production.

In moving the earth; it is rarely bid to move it more than once or slowly. In loading trucks with a wheel loader the loader operator is in charge of getting the trucks in position to make minimal moves and travel with the material to be loaded. Get the trucks positioned to where you can load the bucket, back up a minimum amount as possible while turning towards the truck and beginning to hoist the bucket. Keep the loader in an appropriate gear to keep the engine R.P.M s up to make maximum hydraulic response…normally you will load in first gear and then shift to 2nd gear after the bucket is full.

When I load a truck, I will be raising the hoist as I am moving towards the truck, just clearing the sideboard with the cutting edge of the bucket. As soon as the front part of the cutting edge clears the edge of the bed, I start rolling the bucket forward to dump… this keeps the bucket height down, (for safety as well as not dropping the load),truckers hate being ‘slam dunked’.

It does take practice to get the load centered and not spill any over the opposite sideboard on the last bucket… and not hit any sideboards with the loader. A loader will be able to load much more efficiently if the pile that the dozer is stockpiling is not compacted.

Even the largest loaders have to spend valuable seconds ‘breaking out’ hard packed material that the dozer has run over. Have the dozer push it as high as it can and just make the pile longer. The loader can then chase the pile with the trucks. The dozer has to establish the ‘floor’ grade for the loader to maintain as well as determining how far out to push the pile to allow the dozer not to become ‘muck bound’ with material… it takes experience to do this, if you want to move 4,000 – 6,000 cubic yards per shift with one dozer and loader or track hoe.

A loader operator should come into the pile with the bucket on the floor grade, while slightly raising the hoist… do not curl the bucket back unless you are positive you will have a full bucket. If you don’t get a full bucket, just go with what you have or back up and start again… pitching the bucket back down to get another bite will only lift your front wheels and further compact the material under the bucket.

Loading trucks with a track hoe may be the most efficient method as long as the material is higher than a few feet, if the hoe has to chase material it is not efficient. Getting the trucks to get as close as possible is critical with a track hoe, especially when the cut is high… overextending your boom with a full bucket will cause one track to come off the ground or the whole rear of the machine. I have seen trucks destroyed when a track hoe overextends their boom and tips over.

The track hoe operator is responsible for keeping the floor to grade and smooth enough for the trucks to come in close. Sometimes the dozer, loader or blade will come along and smooth it up, however, don’t count on it!

Loading scrapers with a dozer involves timing and teamwork. Getting ‘tagged up’ smoothly and quickly takes some practice. When the scraper comes into the cut area the idea is to; tag them with the dozer blade or ‘push block’ while they are still moving. This minimizes the impact to the machine and the operator. If using a regular dozer blade? You need to watch the blade ‘corner bits’ around the scrapers rear tires, it’s easy to puncture one.

I will carry the blade high enough to catch the stinger of the scraper and let it slide up to the center of the blade. With practice you can hook up with very little felt impact… without slowing down or stopping. After the scraper is loaded the next scraper should be on the way to get loaded.

The dozer needs to be backing up as fast as possible to get in position to allow the next scraper to get in front of it. I have found this to be one of the most fun operations in mass excavation… making it all work like a clock would.

I am a proponent of loading scrapers downhill whenever possible and as steep as a dozer will back up in second gear. This makes the best utilization of gravity and machines weight… thereby making significantly more production gains than loading on flat or uphill grades. The machines will not be worked as hard either… this matters in very hot conditions and terrain that is hard on tires and grousers on the dozer. It may require more ‘pioneering’ work for the dozer to set this up, or double and triple cutting a small stretch with the scrapers, it can be done with a little planning and ingenuity.

Making production rates can be achieved in many cases by adding more scrapers and trucks… they will pay for themselves. If you start adding dozers, loaders or other support equipment; then you need to do a cost analysis to determine the feasibility.

The production rate is determined by the way the job was bid. The estimator/ project manager should know exactly how this was determined… although I have seen many jobs bid with a ‘SWAG’- scientific wild ass guess. They may make money if done by someone experienced, however it does not pass much information on to the field.

You have to take the amount of money allotted per cubic yard of material and add all your equipment and labor costs to see what your production rate needs to be. The tough part of this may be that: you can’t use the equipment you truly need or the production rate may not be achievable with the conditions on the ground. Many times managers without practical field experience have a hard time visualizing what the job will cost you if you don’t use the correct equipment, (instead of what the job was bid for) and the right techniques to get production loading.

Estimating Part 1

hcss

There are many tools for an estimator to use to bid a job. When I started estimating; the company I worked for just used a yellow notepad, scale and a calculator. While this will work, it is considered primitive with tools like the computer and digitizers available today. When you use something as simple as the computer program EXCEL you can build templates that eliminate repetitive tasks, and at the same time eliminate costly errors due to calculations and or simply forgetting to put something in the bid. There are many good programs out there tailored for construction estimating. I personally love the HCSS programs; HEAVY BID and HEAVY JOB that link bid information to the timekeeping and cost reports,(I will go into this more in an article on project management).

Many estimators today are college graduates that have a degree in a construction field; but they do not have any practical field experience to guide them. This can also be said of some estimators with many years of experience estimating. This can be rectified by consulting with people who do have the experience or better yet…get out in the field for awhile.

I know of one very successful large company here in Arizona that makes their estimators accountable. They take the estimator that bid the job and put him out there as a project engineer, assistant manager or some other role that shows them first hand each portion of the job being performed…I can personally say there is a whole different perspective on a job that you bid when you have to go run it with the budget you bid it with.

Estimators that have little or no “recent” field experience are prone to use “canned” numbers or perhaps old bid tabs to bid a job. This can be a bad practice to use in bidding a job! Each job is unique and the “drill” needs to be run for each significant bid item… this means getting out and visiting the job site, consulting experienced field personnel about how they would build the job and then build the job on paper. How the job is built determines the phasing, which can determine the types of equipment to be used, work schedule and traffic control… conversely each of these things can be the predominant driving factor of the project.

An example I will use is; installing a concrete valley gutter after the paving, (there are places that a paving machine will damage e new valley gutter, therefore it is easier to saw cut and install it to match the asphalt). An estimator may say that you would only a back hoe for a half an hour to excavate and grade the trench. Since it is one of the last things performed on a job; you may not have a back hoe on the job… necessitating the mobilization and or rental of a machine which is typically a minimum of one day.

There a many small items and a few larger bid items that are consistent enough to use “canned” numbers for in civil construction estimating. This is more common in other types of vertical construction; carpentry, electrical work etc. There are just too many variables in earthwork or other disciplines within the civil field… so get in the habit of “running the drill” on each job in order to be accurate.

Getting the job set up and entered into your computer is one of the first things I do… this is essential if you are working on a server with other estimators helping you prepare the bid. HCSS makes this very easy to do, especially if the owner has the job in a digital format. Having done this, you can methodically go through each bid item, build a crew, set production rates… and you get to see the overall bid with just a click.

I have found that very thorough estimators get jobs the right way for the most part… without committing serious errors. When I first started estimating I got several jobs, only to find out later that I had missed something on some of them. It was a sickening feeling to find that I had forgot something significant… however it was a good lesson for me to slow down, and move to the computer to help eliminate mistakes. “It is better to worry about the jobs you win than those you don’t”

Getting a good “takeoff” (verification of quantities) is one of the first things to do when bidding a job. Most of the small private jobs such as ; lot prep/pad cut, parking lots utilities leave this entirely up to you to quantify. Most of the larger and or government jobs are not “lump sum” jobs… they are set up with bid items that are usually pretty accurate. This is ultimately the fairest way; to both the contractor and the owner… everyone is bidding the same thing and if there is a difference in quantity, the contractor gets paid for what is actually performed. This does not mean that you should not double check the plans to verify the quantity… even the best make mistakes sometimes, and most of the time are appreciative to find out before the bid, and let the other bidders know in an addendum. This helps you additionally by having the other bidders on the same page as you, although there are times you may find it advantageous to keep it to yourself… this is a matter of bidding strategy.

There is a temptation for some estimators to bid the competition rather than the job… I do not advise this; your company may not have the experience, equipment or financial ability to build a job like the competition. Rental equipment versus owned equipment, personnel and other miscellaneous things are good reasons not to blindly trust canned numbers… just remember “it is what it is”.

Solicitation of quotes from vendors and subcontractors is another thing to get started early in the process so as to let them have enough time to get an accurate quote together for you… nobody likes to try and get a bid ready hastily. Try and get at least three different quotes for each item… you may even want to get quotes for items you plan to self perform; then you have options.
As the bid date approaches and the bid is basically done… you should have a bid “review” with the owner, other estimators, trusted superintendent or other relevant people to gain a different perspective and check for errors. On bid day you should have plenty of help to sort out quotes and close out the bid… it can be a hectic nerve filled time right up until you turn the bid in.

Dirt Management Part 1

The-Komatsu-D475A-5-Bulldozer.jpg

Dirt management; a term I use in describing how to best move dirt and to a smaller degree, fine grading. One of the first things that need to happen before the job starts is to study the plans and determine whether the job is forecasted to “balance”. Most engineers will try and make a job balance if possible, thereby avoiding an import/ export situation; which due to the cost of trucking; adds a significant cost to a project.

A project management team of the Project Manager (PM) Estimator and the Superintendent will ascertain what parts of the job are suitable for scrapers, off road truck or on road trucks. Get the survey work done next as this will show you a better picture of what you have in the field for cuts and fills.

Some jobs may have a combination dependent on length of the haul and types of material. Scrapers are well suited to material that is predominately dirt, although rocky materials such as river run works pretty well also.
Sharp rocks such as shot rock are to be avoided with scraper spreads if possible, due to tire damage and difficulty in getting loaded. Scrapers are best suited to haul lengths of a quarter of a mile or less due to the heat that builds up in a scraper tire, (there is more weight spread on less surface than trucks). The other factor here is how the job was bid also, jobs should always be built on paper in the bidding process, (some estimators do not do this for several reasons that I will cover later in an article about estimating).

When the job reaches the field, it is up to the management team to make it work to the best of their ability. There may be spots on the job that are so short that a dozer push and or a larger loader can be the most efficient tool to move the dirt; this is especially true in the beginning of a job.

Here in Arizona and many other places, there are some very steep cuts that may require a large dozer to cut 25’ or more just to make the cut accessible for scrapers or rock trucks. The number of scrapers or rock trucks frequently ranges from a minimum of 2 or 3 to 6 or 8; this depends on “cycle time” of loading, travel to the fill, dumping, returning to the cut and the number of loading machines. If there is not too much of a wait for machines to get loaded; additional machines will pay their way in increased loads hauled.
Unsuitable material such as weeds, tree branches, root balls, trunks, asphalt chunks, broken concrete etc. should be placed in deeper fills, specifically out in the fill slopes; as they will not be under the roadway. If they are covered sufficiently with dirt most inspectors will not have a problem with this. Asphalt and concrete are generally allowed to be buried under the prism of the road if they are 3’ below finished sub-grade.

The cut areas on a off road truck haul need to be assessed to see how many different levels will be required to bring it down to grade. This is dependent on size of the machine being used as a loader (track hoe, shovel or wheel loader) steepness of the cut, width of the cut; (to allow room for trucks, dozer and loading implement), you may have to use fewer trucks initially due to tight quarters.
Blasting versus larger equipment or a hammer hoe is something else that needs to be considered in hard material. Soil reports should be consulted in the bidding process to determine material types. I have worked for companies that did exploratory drilling or digging before the job was bid; this helps to a large degree. Once you get in the field there may be unforeseen changes in spite of these preliminary steps; (this can lead to change orders).

In my experience material requiring over 50 blows from a 140# hammer on a test rig is going to be candidate for blasting, or a hammer where blasting is prohibited; hammers are too slow and expensive to be used in mass excavation. Gets the grade checker to do a layout for the drillers and get them going drilling, as this will take awhile; you may be able to start work somewhere else on the job while this is going on.

Setting up a water source such as a meter with a KLEIN tank or perhaps even drilling a well to supply a pipeline that services a pond with a HURRICANE pump or multiple KLEIN tanks is also one of the first things to do before you can turn a wheel in the dirt. Pre-watering is another thing you may consider. Running a water line with sprinklers for a few weeks may work; dependent on access and material type, digging catchments in the cut area that a water pull can back up to and fill, is another option. Pre-watering can be a big boost in production, especially on materials that take a lot water to get maximum expansion. Many agencies require pre-watering and have a moisture requirement of +/- 2% of optimum, 20- 30 gallons per cubic yard are an average that can be used.

The short hauls are tempting to do first, however the longer hauls need to be addressed sooner or later also, many dirt foremen like to” look good on paper”, but it all averages out in the end. Care should be taken to save some of the better dirt to “top out” the grade with, this makes the finished product so much easier to obtain and a better product. Many dirt foremen do not think about this until it is too late; then you may have a small “civil war” between your finish crew foreman and or blade operator. The subcontractors such as utilities, guardrail, signs or landscapers could end up back charging the job for not using better material on top also. I have been on jobs where fine material was so scarce we had to find a place on the job to “mine” it and fill the hole with rocks afterwards; or worse yet import dirt that may not have been bid into the job.

How to operate a motor grader. Part 1

Smaller Cat M3

The blade operator is the quarterback of the earthmoving spread, many times he or she is more experienced than the foreman or superintendent. The blade on a dirt moving spread generally starts earlier than the scrapers preparing haul roads and the fill and frequently works after the shift doing the same and things such as finishing slopes, sub grade or many other incidental specialized tasks. The production pace of the scrapers does not allow the blade operator time to do many of the aforementioned duties during the shift. Everybody talks about scrapers being rough… and they are, but the fact is if you have a good blade operator they will construct and maintain the haul roads so as to be as smooth as possible; resulting in a much better production day and scraper operator health and morale.

The haul roads should be wide enough for two scrapers or rock trucks to pass comfortably. If you are the blade operator; don’t be afraid to have one or more of the scrapers bring some loads of dirt to build or maintain a haul road. These roads are of the utmost importance to the production rate of the spread. Build the roads with minimal vertical or horizontal curves as possible… the more gradual the grade the better! Have a windrow of dirt to work back and forth if possible… at least until you get the haul road firmed up and a crust on it. If a scraper leaks material onto the haul road, clean it off as quickly as possible… sooner or later a scraper will leak material, even new scrapers do it.

Small rocks can cause rock breaks in the tread of these tires on a hard surface such as a haul road. Scraper tires cost $5,000.00 and up! And the down time of hours or days really hurts the production. The scraper operators will love you if you keep their road as smooth as possible…It is not about making them happy, but it helps. Scrapers generally leak the most material coming out of the cut; while they are trying to get the apron shut… it is more prevalent in rocky material. Chase the haul road and when you get caught up, you can cautiously make your way through the cut if it is not too rough, steep or narrow. Pick a time in between scrapers if possible, make sure the dozer operator sees what you are trying to do.

The fill is generally the domain of the blade operator and the cut is the dozer operators. Good communication with the lead scraper operator is critical… C.B radios work pretty good, although they take a beating in the dirt, heat and rugged conditions, it is better than stopping the equipment to talk. As the scrapers approach the cut, they should follow the contour of the toe of the fill slope… generally the grade checker or dump person will be there to start them. The scrapers should dump their loads in consecutively in one “ribbon” before moving over to the inside, this is extremely important so as to keep a system going that that everyone can follow. It also is very beneficial as regards grade control, safety, processing moisture into the material and compaction. The lead scraper will generally set the level of the dump, the next scraper will smooth this load and start dumping 10- 20 feet before the previously load tapers off.( Consistency is probably the most important thing about dirt work! If something is consistent is so much easy to fix any problem)

Gaps in between scraper loads drive blade operators crazy! and makes for a rough, inconsistent fill that takes extra work on the blade operator’s part to make it right. After the first ribbon is completed the water pull or truck should spray water on it if it needs it. Then the blade should blade the material out to the grade mark on the stakes and slope it to the inside. This is start the fill correctly and keep scrapers leaning to the inside rather than the outside… you do not want scrapers falling off of the fill!

After the second ribbon is completed to the left, bladed and watered… direct the scrapers to begin using it as a return path to the cut. This accomplishes the task of compaction, the water pull or truck can be of additional help in this regard also. Sometimes there is a need to “double dump” to get the fill shaped up right… most inspectors will never say anything about this as it is deep in the fill anyway. After getting squared up; work all the way to the inner limits of the fill, repeating the pattern of watering with the scrapers “splitting their tracks” or not following the exact path as the scraper before them, to accomplish the compaction.
Once you get everyone on the same page this works fantastic and everyone is a happy camper… well the inspector may not like the depth of your dump…although a loaded scraper can easily compact 3 or more feet of properly moisture processed material. You can work with the inspector to get to a depth that is workable. As you top the fill out you can bring the inside up to grade whether it is a crowned or super elevated roadway.

You always give the scraper “right of way” even if you are blading the haul road for them… just turn away with your windrow and then pick back up where you left off… take a deep breath, take a drink of water or light a cigarette while you let them go by. Load count is the name of the game here, besides that many scrapers brakes do not work well and they may have to use their “big brake” to stop… leaving a divot in the haul road… it’s just better to keep them moving.

Many spreads run the scrapers 8 hours and keep the blade, water pulls and dozer(s) running 10 or more hours to get everything ready for the next day. It is a good idea to have an alternative dump site ready for the scrapers to go to in the event of a compaction test… inspectors do not like to get on the ground in the middle of a bunch scrapers for safety’s sake… I don’t blame them; I have seen several pickups run over by scrapers.

Notwithstanding; if they are using a “sand cone” testing procedure, it takes considerably more time than a nuclear gauge… and the scrapers shake the ground enough to affect the outcome of a test. It is just a good idea to have a “ace in the hole” anyway for unforeseen problems with the fill.

Some jobs may be set up so you can sit on two cuts with at least two dozers with fills on either side and one in the middle, this can really increase production as well as giving several options, I will go into this more in subsequent posts.

Equipment Safety

The fundamentals of operating any piece of heavy equipment begin with safety. The front end loader has unique characteristics that need to be considered. The main danger with a front end loader is the danger of overturning the machine due to the bucket being in the raised position. Having material in the bucket adds considerable weight and therefore acts as leverage against the machine side to side. This needs to be carefully considered when operating on uneven or rough ground. As an operator you should have a good working knowledge of each individual machine before performing any task at production speed. Each machine is a little different and when you go from operating say; a Caterpillar 938 loader to a Caterpillar 992 loader, the size and handling characteristics are vastly different. Even a tire that has improper pressure can cause the machine to sway from side to side with the bucket raised, possibly leading to the tire to blow out with a load in the bucket resulting in the machine overturning. I cannot stress enough the importance of inspecting the equipment before the shift, mid shift and post shift. An operator needs to know what to look for and report anything out of place to your supervisor and or mechanic. This could save your or life or someone else and prevent very costly repairs to the equipment. Heavy equipment is very expensive to maintain, a large loader or scraper tire can easily cost $ 5,000.00 to replace, and engine can be $20,000.00 – $40,000.00 and this does not even address the down time for the company or you.

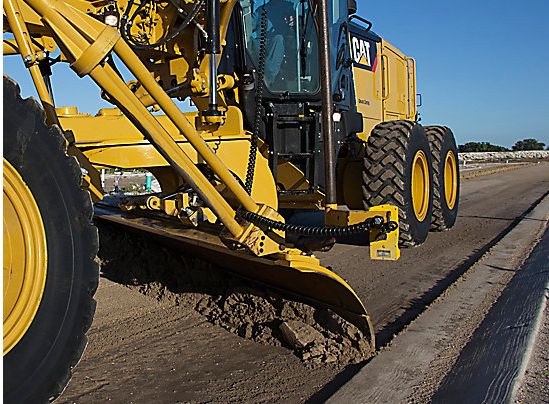
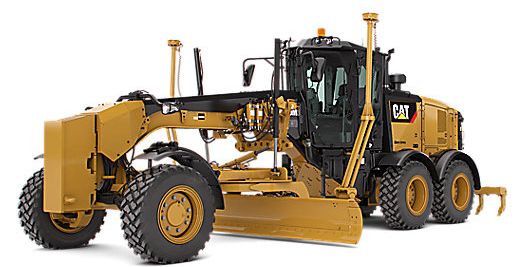
The Motorgrader has very unique capabilities, such as slope work that need to be understood before attempting to perform safely. Another present danger with the grader is people on the ground working around the machine, such as a grade checker or stake chaser. The grader, like every piece of equipment has a “blind” spot that the operator and those working around it need to be aware of. Directly behind the machine is a place that the operator cannot see (some of the new Caterpillar M series have a camera to view this area as an option) but one should still view it as a blind spot.

A bulldozer has incredible capabilities such as working on steep slopes or ripping out large boulders that could roll downhill and crush property or people. Many times a bulldozer will be the piece of equipment to “Pioneer” a large steep cut just because of its ability to get there and the mass excavation ability. I have personally seen boulders that were dislodged in this operation roll downhill a long ways and destroy vehicles. Sometime this may be hard to avoid; so there needs to be traffic control to keep vehicles out of the area while this operation is going on. Furthermore I cannot overemphasize that communication is vital between the operator and crewmembers on the ground. Bulldozers are built with a low center of gravity; however you can still turn one over. Another danger is having a larger size rock roll under the uphill side track while side casting on a slope could be enough to turn the machine over, especially if the operator is unaware of it. Solid rock is also very dangerous as the grousers on the tracks cannot get traction; especially if the machine is sideways (it is just like a skate on ice). A large bulldozer has blind spots along the sides and in the rear also. People on the ground should always get the operator to make eye contact with them before attempting to approach the machine.

Scrapers are some of the largest pieces in the field, and possibly have the most important role in constructing something ;( you cannot fine grade something until it is built). Rollovers are the most common safety concern with scrapers. Carrying the “can” too high on a slope or when turning can lead to a rollover due to the weight being carried higher, a load of dirt can easily weigh 50,000 lbs. A Caterpillar 631 G model scraper weighs in at approximately 102.000 lbs empty; combine this with speed, a slick haul road and you have very deadly machine that will not stop in a dime! Right of way should be given to scrapers, especially when they are loaded. They are the true “moneymakers” of the spread.

Track hoes are a very versatile machine that can perform mass excavation, slope work and underground trenching. They have a blind spot directly behind them that the operator and people working around the machine need to be aware of. Another safety issue involves the underground trenching; improper shoring, trench benching, spoils placement and striking buried utilities can lead to equipment damage and or serious injury to the operators and people working in and around the trench. It is a very good idea to have everyone on the crew take the OSHA class for trenching and become a COMPETENT PERSON.

Pneumatic and vibratory rollers main areas of safety concerns are; rollovers and crushing. When operating on a slope with a vibratory sheepsfoot you should never operate parallel to the roadway on a slope steeper than a 6: 1, if it is steeper than that you should roll perpendicular to the roadway. Pneumatic rollers are strictly for flatter terrain, they can become stuck very easily or overturn with a minimal undulation of the grade being prepared.

Off road haul trucks can range from something as small as a 35 ton articulated rock truck to a 240 ton mine haul truck. These trucks are pretty simple to operate, which can lead to carelessness. These trucks have a lot of blind spots. Care should be taken to back these trucks on the driver’s side. An example would be; as you approach the track hoe or loader, head toward to the machine and then turn clockwise before you back up to get loaded, all the while you keep the clear path visible out of your driver side mirror. This enables you to see a spotter on the ground or an operator signaling you where to dump or get loaded. These trucks can be top heavy when loaded, slow down as you enter any sharp turns. The rollover danger is the main concern, also you can “roll” a front tire off of the rim, ruining the tire or possibly leading to a rollover. Another danger is present in hoisting the bed to dump the load; you should be on relatively level ground that is very stable. When you get the bed up with most of the material still in the box, there is a tremendous amount of concentrated weight on the rear wheels. If you hoist the bed and it feels like it is leaning, stop and lower it and move to a more stable spot or have the dozer level the dump. Pre and post trip inspections are very critical with these trucks, with tires in the five to ten thousand dollar range and engines twenty to fifty thousand dollars.

Water trucks and water wagons are another critical piece of the spread. They are top heavy when loaded and have the danger of sloshing water that can contribute to a rollover situation. Another safety issue with dual wheel truck is; getting rocks wedged in between the duals that can ruin tires or come loose when traveling on a roadway. I have seen rocks go right through a mud flap and through the windshield of a vehicle following behind.

On road end dumps, belly dumps and side dumps have their issues also. The aforementioned dangers with dumping the rock trucks holds true with these trucks also, especially the 35- 40 end dump trailers. I have seen several of these go over when attempting to dump on unlevel, unstable ground or with a breeze blowing. Having wet material or even a rock lodged in the front of the box can cause it to tip over. A spotter dumping trucks should never stand where this box could fall. Another danger for these trucks is overhead utility lines, make and check before hoisting the box! If you hit an electrical line while hoisting the box, stop and call for help… do not attempt to exit the truck, you could be electrocuted when you touch the ground if you are in contact with the truck. After you dump make sure the bed goes all the way down and your P.T.O unit is disengaged before moving the truck… I have seen partially lowered boxes strike overpasses and other things. This can at the very least ruin your day and cause significant damage, but also injury or death.
Belly dumps main danger is backing over someone or something. There is usually a dump man on a paving spread and possibly a flagger… make sure you know where they are before you back up. Make eye contact with the dump man also, he operates the dump valve on the trailer as you are moving. He needs to make sure and walk to the side of the trailer and not get his feet under the trailer tires… they can roll right up the back of your leg and kill you in a heartbeat. I have seen more than one person that was backed over by a belly dump… backup alarms are mandatory but people on the ground turn them out after awhile, necessitating that the driver pay close attention and it is preferable to toot his air horn a couple of time before backing up. This holds true for other on road trucks also.
Side dumps are very prone to tipping over while dumping… so much one driver I worked with got to the point of being able to shut the engine off before the tractor tipped over. The reason for them tipping over is that the weight of the load all goes to the side while dumping. Most of the rollovers occur while dumping on the fly. To be on the safe side, stop while dumping and or jackknife the tractor 90 degrees away from the direction of the dump.

Back hoes share some of the same capabilities as the track hoe as well as some others. The underground dangers are the same; the blind spot on a backhoe is in front of the machine while the operator is digging with the boom on the rear, the operator frequently “pushes” the machine forward while digging. You can tell when he is going to do this when he lifts the outriggers and lifts the front bucket. Laborers should stand clear of the boom if you are in a trench and make eye contact with the operator if you need to check something within the reach of the boom. The turning brake features on the back hoes are very handy if you know how and when to use them… however when you are not using them make sure they are latched together. I have seen back hoes turn unexpectedly when these are unlatched… one taking out a outhouse and another time a transport driver rolled one off of a trailer, the only thing hurt those times was pride. Never operate the controls from outside of the machine, it is very easy to be crushed and seriously injured or killed while doing this.
I have personally seen seatbelts save many lives and serious injury, wear them!

This article is not a substitute for a safety program or proper training and supervision. It is for information only.

How to get and keep a job in Construction.

If you want to get a job in construction, here are some things that worked well for me. It is a good idea to go to a job site instead of an office when possible; you are just another name on a piece of paper in an office. When you initially go to the office and fill out their application and or leave your resume, ask them who the superintendent is and get his contact information if possible. The timing of your visit is pretty important; your best bet is on a Monday or a Friday … not first thing in the morning as everything is very busy for a Superintendent getting the ball rolling. Mid morning on through the rest of the day is good, if someone does not show up for work on a Monday morning, (which is fairly common) and you show up prepared and qualified to go to work… your chances of getting a job greatly improve. Another good time is on a Friday afternoon. If a Superintendent wants to fire one of his existing employees and you show up looking for a job, the laws of attraction are working in your favor.

It is important to talk to either a Foreman or the Superintendent and let them put a face to name. Dress appropriately for the position and be ready to go to work immediately if it possible on your schedule. Superintendents often have immediate needs and appreciate employees who are serious about working. Many applicants are just going through the motions of filling out an application for unemployment, you showing up prepared sets you apart from these people. If you do not get hired immediately do not despair, ask the Superintendent what would be a good time to check back with him either in person or by phone if it is a long distance and then be diligent about checking back. This is another area that can set you apart from other applicants… in spite of the current economy; it is still hard to find “good” help these days.

If you are a little short on qualifications for the position you are seeking… be honest with a Supervisor! You won’t fool anyone for very long, and then your stock takes a serious hit if you are able to even keep your job. Many times Supervisors are willing to work with someone they think is an honest hard worker looking for a chance. Always ask questions when you are unsure of how to do something. The only “stupid “ question is the question not asked… sure if you are in a high pressure situation your Supervisor may get a little frustrated about taking time to answer, do not take it personal. I remember being asked what seemed to be a rudimentary question by a laborer many times; several times it made me think about why things were being done the tried and true way, and sometimes after rethinking something, it turned out there was truly a better way to do things. I have found that those who have a “know it all” attitude are the one who know the least and the highest of Supervisors can even learn something from a laborer. The people who ask questions with a genuine intent to learn are the people who make excellent employees and eventually Supervisors… I have yet to see a Company Owner that did not appreciate someone wanting to learn.

Other things to do to keep your job and advance are; show up on time, have the right personal protective gear for the job at hand, try and get along with your fellow employees and Supervisor. You do not have to be a “brown noser” or anything like that, just be respectful and if in doubt, just keep quiet with your ears open.